Featured Slider

Showing posts with label make up tutorial. Show all posts

Dramatic Glitter Winged Eyeliner


Well I think everyone knows at this stage that I am kind of a fan of winged eyeliner haha . I thought I would go a little more dramatic on the wing & apply some glitter . I bought nail art brushes from Poundland & they are so handy (and cheap) for detailed looks. If there is any fall out of glitter you can always tidy it up with a wipe , this is why I like applying foundation etc after the eyes . I must write a blog post on the eyebrow product I currently use because I absolutely love it ! This look  would look lovely with a sleeked back ballerina bun .

Product List

Eyes
Black Pencil Eyeliner : Ted Baker Black Eyeliner Pencil (from a Christmas set)
Glitter : Penneys/Primark Gold Glitter
Fake Eyelash Glue : DUO Striplash Adhesive -Clear

Eyebrows


Watch Video in HD & Full Screen click 'Here' . Please subscribe to my channel if you like my videos .

If you have any tutorial or video recommendations please let me know , always love feedback .  

Thanks For Watching !
Alannah x

SOSU Contour Palette | Review & Tutorial


I got this palette as a Christmas gift from my Aunt but I was actually going to go out & buy it because the week before I received it as a gift we got it in work & I loved using it on clients .

The creams are really creamy & easy to blend , which is very important when it comes to cream contouring because previously I've had cream contour products that set in place straight away , leaving me with zero time to blend them out . The two powders in the palette aren't overly pigment so you don't have to worry about ruining your make up by applying too much , instead you can gradually build on the colour . The shades are perfect for Irish skin tones & there is nothing too dark . There is also a shimmery cream highlighter which I love using under powder highlights just to make them super intense .

The palette retails at €29.95 on the SOSU online shop .


Watch in HD : Click Here .

Please like , share &  subscribe to my channel if you enjoy my videos .
My YouTube Channel : Click Here .


Thanks For Watching/Reading .
Alannah x

Simple Brown Smokey Eye | Video Make Up Tutorial


First Post of 2017 ,  Woooo ! Hope you all had a lovely Christmas & New Year . I for one am kind of happy that everything's back to normal . Don't think I could look at another box of chocolates or a glass of wine at this stage .


Watch in HD : Click Here .

I recorded this the morning after New Years Eve so please excuse the messy hair & not so fresh face haha . This look is quite simple to create you just need patience and some good blending brushes . It would go with basically any outfit or lip colour . I did a lot of blending underneath my eyes also , but if that's not your thing or if you have smaller eyes , you can apply less under your eyes .

Product's Listed & Linked
Black Pencil Eyeliner : Ted Baker Black Eyeliner Pencil (from a Boots Christmas Gift Set)
Mascara : Ted Baker Mascara (from a Boots Christmas Gift Set )
Fake Eyelashes : Poundland


What would you all like to see from my blog this year  ? Foundation first impressions seem to go down well , so maybe more of them ? This year I want to focus more on YouTube so expect more videos . You can subscribe to my channel & see more videos by clicking here .

As Always, Thanks for Watching/Reading .

Alannah x


How To Create The Perfect Lip


Feeling festive & what better way to get into the Christmas spirit then a red lip tutorial !
In this tutorial I give tips that will help your lipstick stay put all night long , even if your kissing someone underneath the mistletoe ... (that was cringe... sorry) .

Products Used :

Lip pencil : Primark Lip Pencil

Steps

Step 1 : Lip Scrub - You can make your own with honey & brown sugar or oil olive & brown sugar . You can also buy them in Penneys & Lush . Put it on your lips & give them a scrub , then let it sit for a minute before removing it with a damp cloth . It will remove all the dead skin on your lips .

Step 2 : Lip Balm - Apply lip balm to moisturise your lips .

Step 3 : Apply a lipstick of your choice .

Step 4 : I then applied a lip pencil a few shades darker to create a subtle ombre effect .

Step 5 : Conceal around the lips to define them .

Step 6 : Set the concealer in place with powder .

Step 7 : Rip some tissue so its nice & thin , set it on top of your lips & powder . This will make the lips look matte .

Step 8 : Highlight the inner part of your lips to make your lips appear fuller .

Step 9 : Blot your lips so the lipstick doesn't get on your teeth .


Watch In HD / Subscribe /See More Video's : Here  .

Hope you all enjoyed this weeks video , Its hard to believe Christmas day will be over this time next week ! Hope you all have a good one spent with loved ones.

Thanks for reading/watching .
Alannah x


Christmas Night Out Make-Up | Product List


Christmas is fast approaching and with that Christmas nights out . There is one look that always reminds me of Christmas & that is a red lip with a smokey brown eye . A very classic look that works great paired with a little black dress . This look is very simple & easy to recreate . You don't have to worry about getting the winged eyeliner perfect either because its more of a smudged out smokey look . I have listed & linked the products used below , if you have any other questions about the look feel free to ask .


Product List

Skin
Prep : Simple Hydrating Light Moisturiser
Foundation : Make-up Forever Ultra HD Foundation
Concealer : LA Girl Pro Conceal
Powder : Kat Von Shade + Light Contour Palette
Highlight :Anastasia Beverly Hills Glow Kit Sun Dipped
Contour : Kat Von D - Shade + Light Contour Palette
Blusher : Blank Canvas Cosmetics - Pippa Palette

Eyes
Eyelid Primer : Mac - Soft Ochre Paint Pot
Eyeshadows : Anastasia Beverly Hills - Modern Renaissance Palette : Tempera , Cyprus Umber, Warm Taupe
Eyeliner : Collection Extreme 24 Hour Felt Tip Liner
Mascara : Rimmel Scandal Eyes -Mascara
Eyelashes : Ardell - Wispies
Eyelash Glue : DUO Striplash Adhesive - Clear
Pencil Eyeliner : Mac - Coffee Eye Pencil

Lips
Lipstick : Sleek Cosmetics - Stiletto

Thanks For Reading ,
Alannah x

Everyday Make Up Tutorial


This make up look is my go to make up . I don't wear make up every single day but I would wear this if I was going shopping , meeting a friend for coffee or anywhere where I want to look somewhat  presentable .

I used to not have a go to make up routine & always changed it up but when your in a rush in the morning its nice to have a set way to do your make up so your not fumbling around your make up bag .


Watch in HD here .

I have recently got semi permeant eyelashes (I'll do a review at a later date) and haven't been wearing winged eyeliner since I have had them on but winged eyeliner is & was always apart of my routine . The more you practice winged eyeliner the faster & better you get at it . Here is a blog post on winged eyeliner if you struggle with it : click here to read .

As for the foundation I used in this video its from Make up Designory and is an airbrush foundation so it is made to go through an airbrush gun . I apply it with a brush though, I like the liquid texture & HD finish .

The products that I use in the video are not my all time favourite products , just products I am using at the moment .

Thanks for reading/watching

Alannah x

Summer Skin | Make up Tutorial

Since its coming into summer (even though its snowing , what is the weather in Ireland not like ? ) I thought I would show you how to achieve a glowy/dewy complexion . I only takes a few simple steps & products to achieve .

 
Youtube Channel : Click Here .


Products Used
Exfoliator : Matis Youth Grain
Moisturiser : Simple Hydrating Light Moisturiser
Illuminator : Nars Orgasm Illuminator
Foundation : The Body Shop Moisture Foundation
Cream Highlight : Benefits Watts Up
Cream Blush : Graftobian HD Glamour Crème Palette  - Cool
Darker Foundation : Graftobian HD Glamour Crème Palette - Cool
Spray  : Smashbox Primer Water
Powder Highlight : Blank Canvas Cosmetics Pippa Palette - Lulu

I know a lot of people are fans of matte skin especially oily skinned people so I will try have a post up on matte skin too for those people .

Thanks for watching/reading .
Hope everyone has a lovely bank holiday weekend !
Alannah x

Smokey Brown Eye & Glitter Eye Make Up Tutorial

 
Who doesn't love a little glitter every now and then ? Then look is a very basic brown Smokey eye but the little bit of glitter & the dramatic fake eyelashes make it more special occasion appropriate .Here is a list of the products I used in the video .


Product List                                    

Skin
Foundation : Yves Saint Laurent Touché Éclat foundation 
Concealer : LA Girl HD pro concealer
Contour Kit : Smashbox Contour Kit
Setting Powder : Ben Nye Neutral Set translucent powder
Blush & Highlighter : Blank Canvas Pippa Palette
Cream Highlighter : Benefit Watts Up Highlighter

Eyes & Eyebrows
Eyelid Primer : Smashbox eyelid primer
Eyeshadow : Sleek cosmetics brown eyeshadows from the 'Oh So Special' palette
Mascara :  Maybelline Great Lash mascara
Eyeliner Pencil : Mac 'coffee' eye pencil
Fake eyelashes : Huda beauty lashes in the style ' Farah'
White in the inner corner : Nyx milk jumbo pencil
Glitter : Collection glitter eyeliner in 'Hustle'
Eyebrows : Anastasia Beverly Hills dipbrow pomade in Dark Brown

Lips
Lip Pencil : Penneys lip pencil in Nude
Lip balm : Nuxe Reve De Miel

The eyelashes definitely make this look I'm obsessed with them . Definitely going to purchase more Huda Beauty lashes .

The weekend is here once again and I hope you all have a lovely one .

Thanks for reading/watching !
Alannah x

Coral Cut Crease & Lip Combo | Product List


If you don't follow me on Snapchat (alannahmakeup) you will have missed this make up tutorial , but last week I created this cut crease tutorial using browns, corals & pinks . When I started doing my make up I didn't know what I was going to do but I just started doing my make up and just went with it . This was the result . Anyhow , heres a product list of the make up products I used . I was in Iceland the last five days so expect a detailed blogpost all about Iceland in the coming days .


Product list
Eyes - smashbox eyelid primer , make up geek eyeshadow in peach smoothie , Sleek eyeshadow palette in oh so special , No7 eyeliner pen in dark brown , urban decay eyeshadow in buzz (bottom waterline) , Mac eye pencil in coffee (in waterline) , eyebrows anastasiabeverlyhills dipbrow pomade in dark brown ,mascara maybelline great lash , fake eyelashes ardell Demi wispies

Face
Simple moisturiser , Mac studio fix fluid foundation , Ben Nye neutral set powder , Kiko highlighting and contouring sticks , smashbox contour palette , Pippa palette by blank canvas cosmetics blush & highlight

 Lips
Penneys pink lipliner & wet n wild just peachy lipstick

I tried to pull of the slick back straight hair look here put completely failed .Someday I'll master it haha .
Thanks for reading ,
Alannah x

Hint Of Purple | Make Up Tutorial


I wore this look one night over Christmas (which seems like forever ago) . I liked the way it turned out so decided to recreate it again . If you have brown eyes you will love this look because purple complaimets brown eyes .


Step By Step

Step 1 : Prime your eyelids so your eyeshadow doesn't crease and stays put .
Step 2 : To set the primer apply some cream eyeshadow over the primer with a fluffy blending brush .
Step 3: I used a light brown eyeshadow as my transition colour in the socket . Make sure its blended out well by using a fluffy blending brush in circular and windscreen whippier motions .
Step 4: With a dense eyeshadow brush apply some dark brown eyeshadow to the outer corner of my eyelid .
Step 5 : Blend , blend blend .
Step 6 : Go back with the dense eyeshadow brush and apply some black eyeshadow in the same place you applied the dark brown .
Step 7 : Blend out the black .
Step 8 : Apply some glitter to the inner corner of your eyelid . I used a glitter liner to achieve this but if you have fine glitter that can be used on your face you could apply it with some eyelash or glitter glue . Glitter eyeliner is a lot handier though and doesn't leave fall out .
Step 9 : With an eyeliner brush apply some black gel eyeliner to the waterline & tightline of your eye.
Step 10 : Next is winged eyeliner . I used a small eyeliner brush with black gel eyeliner . If you struggle with winged eyeliner I have a full blog post here :
Step 11 : Apply some purple eyeshadow to your bottom lash line .
Step 12 : Apply mascara , I find the best way to apply it is in zig zag motions from the root of the lash to the tip .
Step 13 : I then applied fake eyelashes , this step is optional . I applied some lash glue to the band of the strip eyelashes , leave it 10 seconds then apply straight above my eyelashes .

 
Product List
 
Eyes & Eyebrows
Dark Brown In The Crease : Pippa Palette Blank Canvas In Dodo
Purple Eyeshadow : Dealz Eyeshadow
Skin
Mositruiser : Kiko Glowing Serum
Cream Contour : Penneys Cream Contour Stick
Powder Contour : Smashbox Contour Kit
Setting Powder : Ben Nye Neutral Set
 
Lips

 
Thanks for Reading ,
Alannah x

Kylie Jenner Inspired Make Up | Tutorial


My take on this Kylie Jenner make up look , I am obviously a lot paler then Kylie so if you have pale skin don't be afraid to try it .Add whatever lip colour you want , not everyone will like the dramatic brown lipstick . With the eyelashes I applied the strip lashes first then applied long individual eyelashes  to get a more dramatic look . I also used tape to create that sharp edge to the eyeliner/eyeshadow . I haven't purchased the Kylie Lip Kit that she was wearing but the Nyx lip stick (listed below) is a reasonable dupe , I just applied a little translucent powder over the top of it to make it matte .

Product List

Face
Foundation : Make up Forever Hd Foundation N18
Conceler : Urban Decay Naked Skin Concealer
Powder : Ben Nye Neutral Set
Contour Kit : Penneys/Primark Contour Kit
Highlight : Pippa Palette by Blank Canvas Cosmetics in Lulu


Eye & Eyebrows
Eyelid Primer : Smashbox Photo Finish Lid Primer
Cream Eyeshadow : Pippa Palette by Blank Canvas Cosmetics in Lily
Transition Colour Eyeshadow (Light Brown) : Pippa Palette by Blank Canvas in Susu
Dark Brown Eyeshadow : Pippa Palette by Blank Canvas in Dodo
Black Eyeshadow : Pippa Palette by Blank Canvas Cosmetics in K.D
Gel Eyeliner : Maybelline Eye Studio Lasting Drama in Black
Eyebrows : Anastasia Beverly Hills Dipbrow Pomade in Dark Brown
Mascara : Maybelline Great Lash Blackest Black Mascara
Eyelash Glue : Duo Glue - Clear
Fake Eyelashes : Ardell Demi Wispies with I Envy Kiss Long Individual Fake Eyelashes

Lips
Lipstick : Nyx High Voltage Lipstick - Dirty Talk
Lip Pencil : Rimmel Soft Khol Eye pencil

What lip colour would you wear with this make up , would you wear the brown lip ?

If anyone has any suggestions on any blog post they would like to see feel free to inform me . Always looking for new ideas .

Thanks for watching / reading .
Have a nice week .

Alannah x


1950s Hollywood Glamour - Make Up Tutorial


Modern twist on a Marilyn Monroe 1950s inspired make up .  A very classic look that will suit everyone and never dates  . Its like the little black dress of the make up world , always a safe bet .
 
Lets jump straight into the tutorial
 
Eyes & Eyebrows
 
Step 1 : Starting off with the eyes as usual so any fall out from the eyeshadow can be easily removed without wrecking the make up . I primed the eyelids with a white jumbo pencil .
 
Step 2 : Set the eyelid primer in place with some cream eyeshadow .
 
Step 3 : With a fluffy blending brush blend a light orange/brown colour into the out corners of your eyes  .
 
Step 4 : With a smaller detailer brush apply a darker brown into the very corner of your eyelid in a 'v' shape .
 
Step 5 : Blend out any harsh edges with an eyeshadow blending brush .
 
Step 6 : Blend some of the soft brown eyeshadow underneath your bottom lash line also.
 
Step 7 : Line your waterline with a white eye pencil . This little trick helps the eyes to appear bigger and brighter .
 
Step 8 : Now on to the fun part ... winged eyeliner . I have a detailed winged eyeliner blog post here . But basically I start with some gel eyeliner and a thin brush create the outer part of the wing first to know my angle . I then I go to the inner corner of my eye and join the line to the wing I created .
 
Step 9 : Apply Mascara .
 
Step 10 : I then applied lashes , this step is optional . I love fuller looking lashes for special occasions like this so I applied one of my favourite lashes , Ardell Demi wispies . Duo glue was the adhesive I used .
 
Step 11 : I brushed her eyebrows up then across to get them in shape I then applied a small bit of Anastasia Beverly Hills dipbrow pomade in blonde with an angled brush starting at the outer part of her eyebrow working my way in . With this product a little goes a long way so I used light strokes . To keep her eyebrows in place I applied some clear mascara over the top of them .
 
Skin
 
Step 12 : I wiped away any fall out from the eyeshadow then applied some Serozinc from La Roche Posay to a cotton pad an applied it to her face . This preps the skin nicely for make up application.
 
Step 13 : I applied some illuminator before foundation to give a nice healthy appearance to the skin and to give some moisture to the skin .
 
Step 14 : I pumped out so foundation onto my palette an applied it to the skin using a stippling brush .
 
Step 15 : I applied some concealer under her eyes then applied loads of powder on top and left it to bake. I applied some concealer under her eyebrows also to make them more defined .
 
Step 16 : I went in with contouring sticks , contouring her temples , under her cheekbones, sides of her nose and jawline . I blended them out with a damp beauty blender .
 
Step 17 : I then powdered her skin to keep it matte and to keep everything in place with a translucent powder . With a clean powder brush I dusted away any excess powder from her under eyes .
 
Step 18 : I then went over the places I cream contoured and powder contoured for a more dramatic effect  .
 
Step 19 : I applied some highlighter to the tip of her cupids bow , nose and the tops of her cheekbones .
 
 
Lips
 
Step 20 : I applied some red lip liner .
 
Step 21 : Using a small lip brush I applied red lipstick to her lips .
 
Lastly I set her face with some setting spray to insure it lasted all night .
 
Product List
 
Skin

Illuminator : Kiko cosmetics glowing serum
Foundation : Make up Forever HD foundation
Setting powder : Ben Nye neutral set
Contour : Kiko cosmetics contour sticks & Smashbox powder contour set
Highlighter : Kiko cosmetics eyeshadow in 208
Setting Spray : Urban Decay all nighter setting spray
Concealer : Urban Decay Weightless coverage concealer in fair neutral


Eyes & Eyebrows

Eyelid Primer : Nyx Milk Jumbo pencil
Eyeshadows : Make up Geek - Latte , Make up Geek - Peach Smoothie , Inglot - 342 , Inglot - 329 , Urban Decay - Foxy , Urban Decay - Blackout
Eyeliner : Maybelline Gel eyeliner In Charcoal
Mascara : Maybelline Great Lash
Fake Eyelashes : Ardell Demi Wispies
Eyebrows : Anastasia Beverly Hills Dipbrow Pomade in Blonde
Eyebrow Mascara  : Natural Collection Clear Mascara

Lips
Lipstick : Kryolan
Lipliner : Mac Ruby Woo

The hair is just the icing on the cake with this look . My friend Veronica did it . Very 50s .
So that's it for  this tutorial I was delighted with the way it turned out . They make up and hair really suited the red dress she was wearing .

Feel free to message or comment below any make up questions you may have , I am always happy to help .

Thanks for reading , and have a lovely week .

Alannah x


Queen Bee - Halloween Make Up Tutorial

 
A much more feminine Halloween make up tutorial today . Queen bee , bumble bee , wasp whatever you want to call it . I think a high sleek bun or big bouncy waves would be beautiful with this make up . A tiara even if you want to go full on 'Queen' . Outfit wise an all black outfit would look lovely and some black wings .

Product List
 
Eyes
Liquid Eyeliner :Essence Eyeliner Pen
Pencil Eyeliner : Mac Coffee Eye Pencil
Fake Eyelashes :Ardell Wispie Lashes
 
Skin
 
Lips
Honey Lips
Random Lip gloss

                                                                         Black Lips


I am happy with the way this make up look turned out because I was just making it up as I went along . It is easy to create so you should definitely give it a go  . More Halloween tutorials to come so keep an eye out for more tutorials .

My Youtube Channel : Click Here

As always if you have any questions feel free to message me or comment below .

What are you dressing up as for Halloween ?

Thanks for watching !
Alannah x


Easy Sugar Skull Tutorial

 
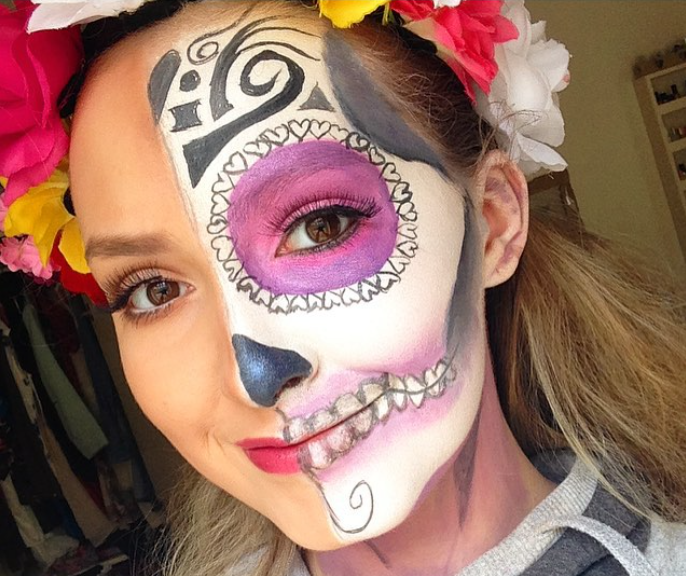
Easy , quick and cheap , three words we all love to hear ! Well here's my first Halloween video tutorial and its all three of these things . All you need is some face paint and 15 minutes .

Water activated paints used to achieve this look are from the Wolfe Fx Hydrocolor 12 colour Palette .


I only did one half of my face I was going to do my whole face but the last few years I have noticed
a lot of people seem to like these half face Halloween make up looks . If you wanted your full face like a sugar skull you could always just duplicate the sugar skull side .

Its one of those looks where you could easily add your own twist too , different colours or different patterns . I kept my design pretty simple and used only white , black , purple and pink face paints .

If you are thinking of dressing up as a sugar skull for Halloween you could wear a dress and flower crown to match the look .

Another blog post will be up this week , hope you found this video helpful and thanks for watching .

What Halloween make up look do you want to see me recreate next ?

Alannah x


Autumn/Winter Make-up Tutorial

This videos pretty self explanatory I think . Below I have written out a product list with links of where to get the products I used in the video . This look is dark & vampy and a nice make up look for a night out . I could really see black leather going well with this look . Hope the voice over doesn't give anyone a headache  ,it was giving me a headache the amount of times I had to record it , haha .

 
Product List
 
Eyes
Burgandy Eyeshadow : Make up Geek Eyeshadow in Bitten
Individual Eyelashes : Available in Penneys all around Ireland 
 
Face
 
Lips
 
My Youtube Channel :  click here  , subscribe for more videos .
 
Thanks for watching !
 
Alannah x


Smokey Winged liner & a red lip (Video Tutorial)

I'm back ! This time with a video tutorial . I love writing the blog tutorials but I think most people including myself find it easier to learn by video , so here it is my first youtube tutorial .


Side Note : I hate my nails , colour and shape I felt like a eagle or some sort of bird. I stuck them on a few minutes before the video and regret it straight away haha .


Step By Step 

Step 1 : I moisturised my skin .

Step 2 : I primed my eyelids .

Step 3 : I then got some black eyeshadow and an angled eyeliner brush . I created a wing the way I would with normal eyeliner but it does not to be perfect because you will be smoking it out anyway .

Step 4 :I added some more black eyeshadow and blend it out again .

Step 5 : I then tidied up my wings with a cotton bud and some make up remover .

Step 6 : To make the eyeliner a little more defined and polished looking I added some liquid liner .

Step 7 : Next I did my eyebrows by brushing them up then across to get the shape . I then applied an eyebrow gel with and angled brush . I started at the outer part of my eyebrow and worked my way to the front of my eyebrow . I lightly applied the eyebrow gel to the front of my eyebrows for a more natural look . To evenly distrubt the eyebrow gel throughout my eyebrows I lightly brushed them again.

Step 8 : I then applied some concealer under my eyes .

Step 9 : Using a light brown eyeshadow I blended it out on my bottom lash line .

Step 10 : I applied my foundation using a stippling brush .

Step 11 : I set my foundation to keep it in place all day .

Step 12 : I then went ahead and highlighted the tops of my cheekbones ,my cupids bow (centre of your top lip) and the tip of my nose .

Step 13 : I applied some blush to the apples of my cheeks .

Step 14 : To warm up my skin I applied some warm toned bronzer.

Step 15 : I lined my lips with a red lipliner then filled it in using a matte red lipstick .

Step 16 : After I did that I applied some mascara to my top and bottom lashes  .

Step 17 : I went in with the brown eyeshadow I used on my bottom lash line and blended it out in my crease using a fluffy blending brush.

Step 18 : Using a damp eyeshadow brush I packed on some gold eyeshadow to the inner part of my eyelid .

Step 19 : I highlighted my inner tear duct with a pearlescent white to brighten up my eyes .

Product List

Eyes
Black eyeshadow : Urban decay eyeshadow- Blackout
Liquid eyeliner :Essence black liquid liner
Light Brown eyeshadow : Make up geek eyeshadow - latte
Gold eyeshadow : Urban Decay Eyeshadow - Half Baked
Inner tear duct highlight : Rimmel Colour Loose Eyeshadow
Mascara : Maybelline Mascara- Great Lash Blackest Black
Eyebrows : Anastasia beverly hills dip brow pomade- dark brown

Skin
Moisturiser : Embryolisse lait creme concentre
Foundation : LOreal Lumi Magique Foundation
Highlighter : Sleek Make up Highlighter (theres currently a sale on the sleek make up website, yay!)
Blush : Sleek makeup blusher
Bronzer : Make up Designory Bronzer - Endless summer

Lips 
Lipliner : No idea what brand this is
Lipstick : Sleek makeup -stiletto

Hope you all enjoyed this video tutorial. This look would even be a nice make up look for a night out if you paired it with some fake eyelashes . If you have any questions feel free to comment below .

Thanks for watching/reading
Alannah x


Going Out Make Up - Step By Step Tutorial


Yayy a blog tutioral thats not my face! Todays blog post is on this make up look i did on my sister one night she was going out . She likes dark/strong make up , so thats what i did . She also asked for and intense inner tear duct highlight . Hope you all like this step by step guide to achieve this look and if you have any questions feel free to comment below .

*Exact products I used listed below*

Prep
Step 1 : Make sure there is no make up or extra oil on her face by using bioderma .

Step 2 : I moisturised here skin so by the time I am on the skin it will have settled in .

Eyes
Step 1 : Prime the eyelids  .

Step 2 : Set the eyelid primer with a setting powder or eyeshadow .

Step 3 : Apply a transition colour into the crease of your eyes. I used a light peach shade .

Step 4 : With a smalls detailer brush apply a medium brown colour to the outer and inner corner of the eyelids leaving the middle of the eyelid free from eyeshadow .

Step 5 : Blend the eyeshadow previously applied into the transition colour , still leaving the centre of the eyelid free from colour .

Step 6 : Dampen your eyeshadow brush and apply a gold eyeshadow to the centre of your eyelid .

Step 7 : Use a small blending brush and blend the edges into the brown eyeshadow .

Step 8 : Apply winged eyeliner (click here for full indept winged eyeliner tutorial) .

Step 9 : Line your waterline and tighline with a black eye pencil .

Step 10 : Blend out a dark brown eyeshadow on your bottom lash line .

Step 11 : Apply mascara .

Step 12 : Apply lashes .

Step 13 : I highlighted the inner tear duct with a pearly white colour . I love highlighter in the inner tear duct , i think it really brightens up the eyes .

Foundation 

Step 1 : Now that the moisturiser has settled in apply some foundation . I used a medium to full coverage foundation .

Step 2 : Powder the foundation to set and to make the make up look matte in photos .

Step 3 : Apply some bronzer to warm up the face .

Step 4 : Apply some highlight to the tops of the cheeks , nose and cupids bow  . This will reflect light and make your skin glow in all the right places without looking oily .

Eyebrows 
Step 1 : Using an angled brush and a brow cream gel i filled in her eyebrows , making them slightly longer at the ends and slightly darker in colour then she  would naturally go for .

Lips
Step 1 : Lined here lips with a lip liner .

Step 2 : Applied lipstick .


Product List 

Eyes 
Medium brown eyeshadow : Urban Decay eyeshadow - Tease
Pencil eyeliner : Gosh cosmetics white kohl eyeliner pencil
Inner Tear duct Highlight : Wet n Wild corrector palette - the white pearlescent shade(cant seem to find it online) 

Face 

My next blog post should be up Thursday/Friday with a full review on the Loreal true match foundation that i did a first impressions blog post on so stay tuned for that . Getting a little bit more organised with this blogging thing .

Hope you all have a lovely day and thanks for reading .

Alannah x

Kim Kardashian Make up + Cream Contouring Tutioral

Everyone seems obsessed with the Kardashians/Jenners theses days , but I'm just obsessed with there make up artist Mario Devindovic . I think we can all agree that Kim Kardashians everyday make up is still more then some of us would wear on a night out but were not all followed around by paparazzi. Cream contouring is time consuming but I love this look for a night out . I have the face of a five year old so its nice to contour the heck out of my face and give my face some structure .


Everyone has this idea that cream contouring its very fake looking and sometimes it can be but if you use lightweight products and blend properly it can look really skin like and more natural then contouring with powder products .


 Mario is Kim's make up artist most of the time they have also became great friends over the years  , two other make up artists that also do her make up quite frequently are Joyce Bonelli and Rob Scheppy both very talent beauty make up artists as while .

 I have watched and read loads of interviews with Mario and his thing really seems to be layering . He doesn't just apply concealer he applies cream , liquid and powder . When he's doing lips he uses a lip pencil a lipstick , lip glosses and even mixes some lipstick together to make the perfect colour . He believes that layering is great for the make ups longevity .
I looked at close up pictures of Kim K and created this look. Its not really based off one of her make up looks but just a mixture of a few .
 
Eyebrows & Eyes
 
Step 1 : I started off with the eye brows first . I tinted my eyebrows yesterday so I didn't have much filling in to do . Kim's eyebrows are usually really soft looking nothing to harsh. I filled them in with an eye shadow to create that soft effect.
 
Step 2 : I  then primed my eyes with some concealer . This conceals any pigmentation on my eyelids while making the eye shadow  applied on top more vibrant .
 
Step 3 : I applied a lovely shimmery cream eye shadow with a dome shaped eye shadow brush to my inner tear duct and inner corner of my eyelid. I love the way this looks really brightens up your eyes and makes you look more awake.
Step 4 : I then applied a pale brown matte eye shadow colour as my transition colour with a fluffy blending brush .
Step 5 : I took the same eye shadow again and blending it out under my bottom lash line .
 
Step 6 : I then applied a dark matte brown to the outer corner of my eyelids , then blending it out .
Step 7: With a black eye pencil I lined the top lash line and created a small flick. I then smoothed it out with an angled brush . (full winged eyeliner tutorial here)
Step 8 : I lined my tight line with the black eye pencil .
 
Step 9 : I lined my waterline with a white eyeliner pencil . Kim goes between black and white pencils on her waterline but usually wears black when she's going to an evening event.
 
Step 10 : I applied some mascara to my top and bottom lashes.
Step 11 : I applied Penneys fake lashes in Sultry . Actually my first time wearing these and I really like them . Kim usually wears individual lashes but she's has quite long eyelashes to start off with .
 
Face
Step 1 : I Made sure there was no make up on my face by using micellar water on a cotton pad . A clean base is essential for an even foundation finish .
 
Step 2 : I highlighted under my eyes , centre of my nose , centre of my forehead , centre of my chin and under my cheekbone contour .
Step 3 : I contoured the sides of my nose , top of my forehead , sides of my forehead , under my cheekbone, the centre of my cupids bow and under my bottom lip .
Step 4 : With a damp beauty blender I blended the contoured and highlight by damping so I don't move the product .
Step 5 : On top of that I then applied some light liquid foundation on the places I previously highlighted and some darker liquid foundation on top of the contoured previously applied .
Step 6 : I blending this out my dabbing it with the beauty blender and using my fingers .
Step 7 : I powdered my face with translucent powder and a powder puff , dabbing again so none of the make up previously applied moves .
Step 8 : I warmed up the cheeks with a little bronzer .
Step 9 : I applied some blush to my cheeks just to give a natural flush .
Lips
Step 1 : I Lip lined my lips .
Step 2 : I then applied graftobian cream blush as a lipstick .
Step 3 : Last put not least I applied a natural lip gloss  .


Exact Products used:
Eyes
Eyeshadow Transition shade: Urban Decay eyeshadow - tease
Black eyeliner Pencil : Make up Designory black eye pencil
Fake eyelashes : Penny's/Primark Sultry Fake lashes
Fake eyelash glue : Duo eyelash adhesive dark tone

Skin
Skin prep : Bioderma H20

Lips


Hope you all like this look , I am really happy with the way it turned out and reckon its going to be my go to look on a night out from now on .

As always if you have any questions or want any advice feel free to comment  below .

I will do a more in depth contour blog post (best products to use , how to contour for your face shape etc ) soon .

Alannah x