No Make Up Make Up | Video Tutorial


Ages ago I did a blogpost on the 'No make up make up ' look . Its a perfect look if you don't want to look like your make up but want to look fresh faced & ready for the day ahead . Video is differently my favourite way of learning so I decided to put together a video tutorial with an updated 'No Make up Make Up Video ' .

Cream products have a more skin like finish & work best . As you can see in this video I used a peachy pink cream blush on my cheeks & lips and a cream highlighter . They blend in seamlessly and cant be seen sitting above the skin .

First off on the eyes I applied Mac Paint Pot to remove any discolouration (veins , redness etc ) . To brighten the eye area & to make my eyes look more awake , I applied a white eyeliner in my waterline, centre of my eyelids & under my eyebrows . I then also applied mascara and lightly applied a thin line of dark brown eyeliner to give the illusion of slightly thicker lashes .

I made sure there was zero make up on my skin by using a cleanser and a cotton pad . I then applied the moisturiser & the beauty elixir mist which really helped revive my skin .


Watch Video In HD/ Wider Screen : Click Here .


                                                                    Before Picture ft Bed Hair


Products Used

Moisturiser :  Aldi Lacura Renew Q10 Day Cream (I accidently deleted the clip where I applied this but I applied it at the beginning)
Face Mist : Caudlie Beauty Elixir
Concealer : SOSU Contour Palette - Shade 1
Powder : SoSu Contour Palette
Highlighter : Collection Speedy Highlighter - Pearl Sheen
Eyelid : Mac 'Soft Ochre' Paint Pot
Eyeliner : Dark Brown Eyeshadow (with a damp eyeliner brush or you could use a brown eye pencil )
White Eyeliner : NYX Cosmetics Slim Eye Pencil
Mascara : Maybelline 'Falsies'
Lipbalm : The Body Shop Wild Argan Oil
Cream Blush : Graftobian HD Crème Palette in 'Cool'  -Peach Blush ( also love NYX blush in 'Natural' )
Eyebrows : Morphe Eyebrow Palette
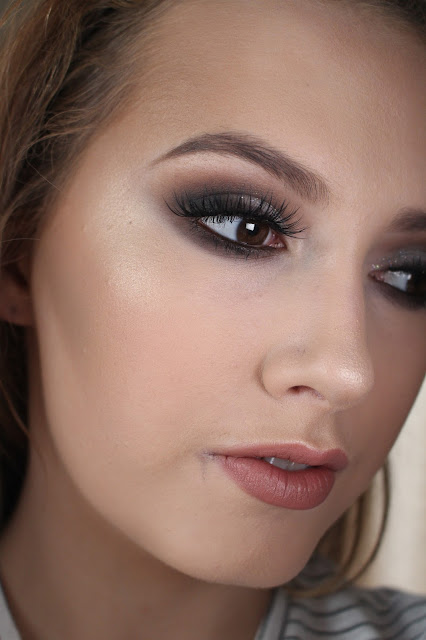
                                                                    After

Thanks For Reading/Watching !

Alannah x

Bargain Beauty Buy | Collection Lasting Perfection Concealer


Another Bargain Beauty Buy blogpost . Today it about one of my all time favourite concealers that's an absolute steal. Its the Collection Lasting Perfection Concealer from Boots . I use the colour 'Fair Shade 1' which is nice & light in colour so it acts as an under eye highlight/concealer . It was very popular beauty blogger product a few years ago but since hasn't been as popular with so many other concealers coming out . But its one that will always have a place in my kit .


Its full coverage & long lasting . It can crease very slightly if you over apply it under your eye area due to the slightly thick consistency . That's only a minor flaw that just requires applying a thinner layer under your eye area instead of applying a thick layer . The product retails at €5.79 in Boots Store nationwide and comes in 4 shades (the shade in the pictures above is 'Cool Medium Shade 2' )  .

Great at covering dark undereye circles & spots (if I was applying it on a spot I would apply the product to the back of my hand then get another brush to apply it with , otherwise you are contaminating the wand that's with it & spreading germs (aka giving yourself more spots) . Its very similar to the Urban Decay naked concealer but not as lightweight as that one , but for the price you couldn't beat it ! The pigmentation is amazing in this product and its guaranteed to sort out those Monday morning undereye circles . A little goes a long way too so the tube lasts me quite some time .

Loads more blogposts coming your way & if you have any blogposts or videos you would like to see just send me a  message . Always happy to help .

Thanks For Reading !
Alannah x


Purple Smokey Eye With Pink Glitter | Video Tutorial


This video tutorial took agesssssssssss to upload , countryside wifi for you ! To be completely honest I am such a creature of habit that I always go with brown & gold smokey eye on myself for a night out . If I was wearing a black dress or something really simple I would dress it up with a more dramatic make up look like this one .

Its a spotlight eye so I blend out the eyeshadow in the inner & outer part of my eyelid , leaving the centre free of eyeshadow . I then apply the pink glitter to the centre of my eyelid . You can use glitter glue or eyelash glue for this .

Glitter can be messy to work with so I would recommend doing your eyes first just so you can remove any fall out before applying your foundation .


Click 'HERE' to watch the full video in HD & wider screen . Please Subscribe to my YouTube Channel if you like my videos , I upload weekly .


Products I used

Eyelid Primer : Mac Paint Pot - Soft Ochre
Cream eyeshadow : SOSU Contour Palette
Light Brown Eyeshadow : SOSU Contour Palette
Purple Eyeshadow : Urban Decay - Psychedelic Sister
Pink Glitter : Penneys/Primark Glitter
Glitter Glue : Penneys/Primark
Black Eyeshadow : Blank Canvas Cosmetics Pippa Palette - K.D
Felt Tip Liner : Collection Felt Tip Liner
Liquid Liner : Wet N Wild
Eye Pencil : Ted Baker Black Eye Pencil
Mascara : Maybelline - the Falsies
Fake Eyelashes : Penneys/Primark 'Sultry' Lashes
Fake Eyelash Glue : Duo Glue

If you have any questions or tutorials you would like to see feel free to message me .

Thanks For Reading / Watching !
Alannah x

Bargain Beauty Buy | PS Strobe Cream


I have decided to start a new series on my blog . If you love beauty products & a bargain (who doesn't) I will be writing about my latest finds that our under €15 (most of them will be under €10) each week  . So when pay day comes & you feel like treating yourself look no further !

Irish model & Make up Artist Tara O'Farrell mentioned last week that she loved the Penneys Strobe cream on her snapchat  . I picked it up when I was in Penneys a few days ago & have been wearing it everyday since .


When I bought it I thought it was going to be similar to the Nars Illuminator in 'Orgasm' which is an illuminating base that has a rosy tint to it because on the packaging it says 'Rose Face & Body Highlighting' .After using it I would say its more like mac strobe cream because it has more of a cool undone , not rosy . Which I also love , just not what I thought I was buying .

Saying that I love this product & cant wait to use it in the summer time  ! I think it might be even more glowly then Mac Strobe Cream .
When I say you need very little , I mean it ! I apply a little to my hand & mix it with a little moisturiser before I apply foundation to my face . It makes a perfect dewy base .  
It retails at €4 which is a reasonable price considering It will last you ages !

If your in Penneys/Primark definitely pick one up , very very similar to Mac Strobe Cream .

Thanks For Reading !
Alannah x

Indepth Winged Eyeliner Video Tutorial

One of the most daunting make up tricks , winged eyeliner . If you know me you will know that I am a big fan of winged eyeliner & probably should have wings permanently tattooed on my eyes at this stage . So you could say I've had a lot of practice . I hate to say it but the old saying 'practice makes perfect' applies here . Here's some tips to help you along the way to hopefully make it a little less daunting .


Watch in HD 'here' . Please subscribe to my YouTube channel if you like my videos to be notified when I upload .


The first thing you need to decide on is what product you want to use & find easiest to use.

Gel Eyeliner - Great for professional make up artist for hygiene & how black and pigmented it is . Very unforgiving for new beginners . If you make a mistake it can be very hard to remove .

Favourite Gel Eyeliner : Inglot AMC Eyeliner - 77

Liquid Eyeliner - My favourite of them all . As I said in the video for the reasons being you can get a fluid , sharp & defined wing . Its more forgiving then gel & I get use out of the whole tub . Good for covering fake eyelash bands. Its not the easiest way to apply winged eyeliner , but it looks well .

Favourite Liquid Liner : Essence Essence Dip Eyeliner

Felt Tip Eyeliner - Very similar to liquid eyeliner . Not great for make up artists as its not hygienic but perfect for your own make up bag . Not as pigmented as Gel . You have a lot of control over eyeliner but the felt of the eyeliner really matters , if it has a thick felt you'll end up with thick eyeliner . Good for beginners .

Favourite Felt Tip Eyeliner : Collection Extreme 24 Hour Felt Tip Liner

Pencil Eyeliner - Not great for winged eyeliner , the pencils usually too thick and would make it very difficult to do winged eyeliner with .

Black Eyeshadow (with a damp brush)  - I personally think this is the best for beginners . Really easy removed (but does last all day/night) if you make a mistake . Most people have black eyeshadow(make sure its pigmented)  so you dont have to go out & buy a new product .

Favourite Black Eyeshadow : Really just any black eyeshadow that has good pigmentation .


Step 1 -
You want the angle to elongate & slightly lift your eye without being too arched . Make sure you are opening your eye while doing it because if you have your eyes are closed it is going to look completely different when you open your eye . I aim in the direction of the bottom of my eyebrow . Its up to you how thick of thing you like your eyeliner .

Step 2 -
After I create the wing I then go on to do the inner part of my eyelid . Using a small brush & the black (or whatever colour you want) I start doing little small brush strokes in the inner corner of the eyelid .

Step 3 -
I then fill in the centre part of the eyeliner , joining the outer wing to the inner part of the eyeliner .

Top Tips
- Steady your elbow on a table to avoid shakiness & balance your baby finger on your cheek to steady your hand .
- Concealer under the wing to sharping it .
- Use sellotape if you are finding the wing really difficult . Just make sure both wings are at the same angle .
- Have a firm enough grip on the brush your using just so you have more control  .

I also did another blogpost on eyeliner a while back . 'Click Here' if you want to have a look at that blog post also . Hope this post/video helped . Any other questions you may have feel free to message me .

Thanks For Reading /Watching .
Alannah x


Make Up Muse | Ve Neill


Todays Make up Muse blog post is on three time Oscar winning make up artist Ve Neill . Ve Neill was born in California in 1951 as Mary Flores . Her next-door neighbour growing up was a Make Up Artist . He used to create amazing Halloween looks & she always said to him that she wanted to do what he does when she got older .

In the early 70s it was a very male dominated industry & Ve Neill was one of the first woman to join the Union & paved the way for other woman . She actually studied Fashion Merchandising in College & at 18 owned her own vintage clothes shop . She learned how to do make up by a man she met at a science fiction convention . She then began to work on some small independent films before getting into the union for make up artists .

She has won Oscars for the make up in Beetlejuice , Mrs. Doubtfire & Ed Wood but she has been nominated for eight Oscars , which makes her the female make up artist with the most Academy Awards/Nominations .


The other make up artists I have written about so far are Fashion/Editorial/Beauty Make up Artists . Ve Neill is a able to create both Beauty & Special Effects Make up but specialises in extreme fantasy looks . She is also a judge on the TV show Face Off , where make up artists compete for $100,000.


She has created some of the most iconic looks in television & film that are recreated year in and year out at Halloween . She worked along director Tim Burton & Actor Johnny Depp quite frequently . Other successful movies she has worked on are 'The Hunger Games' , 'Austin Powers' , 'Hook' , 'The Amazing Spider Man 2 ' , 'X Men :Days Of Future Past ' along with many many more .


This woman is a huge inspiration of mine , she is just an absolute genius & the things she has achieved as a female make up artist in the film industry really inspire me and a lot of other make up artists.

I feel like Make up is a lot different now then when Ve begun her career  , now social media plays a big role in the career of a Make up Artist where as when she begun , her talent, personality & work ethic is what got her to where she is today .

Thanks For Reading !
Alannah x


How I Fill In My Eyebrows


All about brows in todays post . The product I am recently loving is as cheap as chips ! I've used Morphe , Anastasia Beverly Hills(which I also love) , Smashbox , Benefit , Sleek ... just to name a few & this little gem is the cheapest out of the lot & my favourite .


Watch in HD : click 'here' .

I love the Anastasia Dipbrow Pomades , there more expensive though and they have to be ordered online (I ordered mine off CultBeauty.co.uk)  . The eyebrow product I used in this video is from the brand MUA , Superdrug are stockist of the brand and it retails at £4 ! Yep £4 ! Very comparable to the Anastasia Dipbrow . It also has a little brush on top so its really handy for traveling or keeping in your handbag .

Being realistic I don't crave out my eyebrows every single day , I mean ... who has time for that ? But I do if I have the time & when I'm not rushing .

I tend to keep to my natural eyebrow shape , as I said in the video I like my right eyebrow and don't like my left one. I think everyone's the same though there is always one eyebrow you like more then the other . Always keep in mind 'eyebrows are sisters not twins' .

Product Used :
MUA Luxe Power Brow Sculpting Gel - Dark Brown
Morphe Brushes - B74 Angle Liner

Thanks For Watching/Reading .
Alannah x