How to : Highlighting and Contouring

Contouring has got ridiculously popular over the last two years and believe it or not its been around way before Kim Kardashian started doing it . Contouring is the art of shading , creating shadow to give the illusion of thinner more sculpted features . Highlighting is the opposite ,when you highlight your drawing attention to the highlighted part of your face .


Powder or Cream ?


Cream Highlight Contour
There is no right or wrong here its just up to personal preferences . Cream contouring (when applied very lightly ) can have a more skin like natural look . But I find it can take longer to apply and blend out .

Powder Highlight Contour
Powder is faster to apply and blend out . When I'm in a rush and want a bit of contouring I always resort to powder .

You can also use both for a more dramatic contour and to set the cream contour in place .


Favourite Highlight & Contouring Products

When I am cream contouring and highlighting I use the Graftobian Hd Glamour Crème Palette . It has loads of shades that are very blendable . This is a great versatile palette great for any make up artists kit .

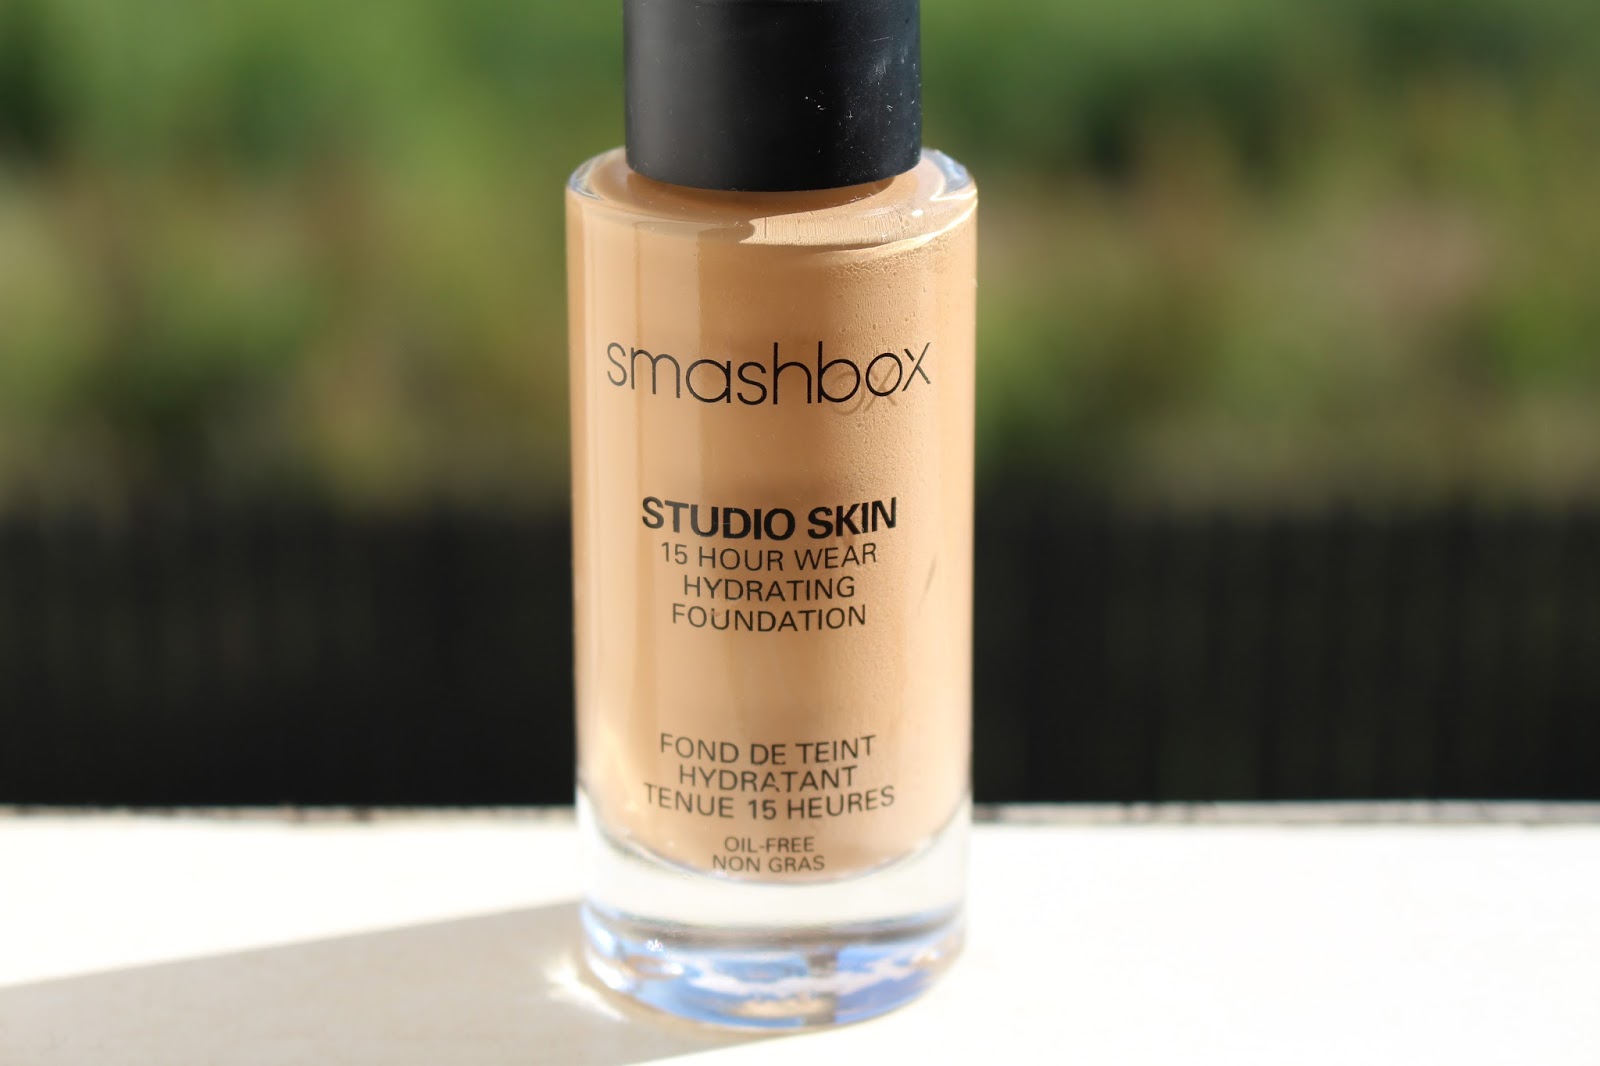
When I am contouring with powder I use Smashbox contour palette which I couldn't recommend more . Three shades that are the perfect contouring shades not too warm or not too ashy . Mirror , small compact packaging great for on the go , comes with a brush and tips on how and where to apply it . Such a brilliant product .

There is loads more contouring products on the market including the ever so popular Anastasia Beverly Hills contouring palette. Which I have yet decided wither I want to buy it or not after hearing lots of mixed reviews .

Matte or Dewy ?

For contouring you need to use a matte product to create shadow and dimension.
For highlighting you can use matte or shimmery products , but I would only apply shimmery highlighter to the tops of your cheekbones , centre of your cupids bow and tip of your nose . Highlighting with a shimmery highlighter in more places on your face will make you look  like a vampire from Twilight. I apply matte highlight to the rest of the places .

Where to Contour?

I for example contour down the sides of my nose , to make it look slimmer , under my cheekbone to give myself more chiseled cheekbones , under my jawline to soften my jawline and my temples and forehead to make my forehead look smaller . If you for example have a really small nose , there's no point of you contouring it , if you have a small forehead there's no point in you contouring it because it will only make it smaller .

Here's a guide on where to contour and highlight your face shape .

 
What brush do you use ?
When using powder contouring and highlighting products I like to use an angled fluffy brush . The handy brush that comes with the Smashbox contour kit is perfect .
For cream contouring and highlighting I like to squeeze my stippling brush to apply the product with more control then when the product applied to the area I want I stop squeezing the brush and blend it out .
 
 
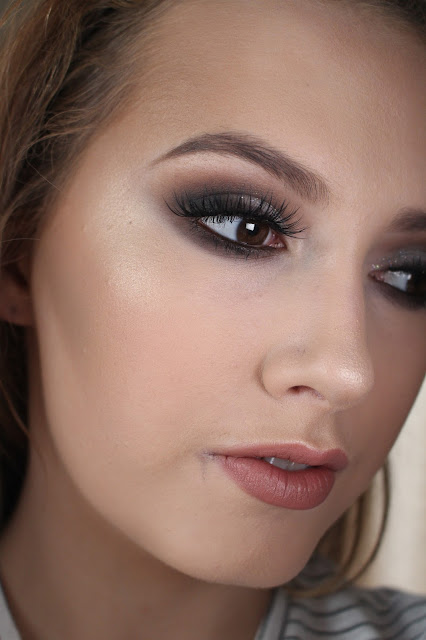
Cream Contouring Step By Step
 
Step 1 : I applied a lighter foundation from the Graftobian HD Glamour Crème palette using a flat foundation brush to apply it . To the centre of my forehead , under my eyes , centre of my nose and centre of my chin.
 
Step 2 : Using a smaller brush with a foundation darker then my skintone I contoured down the sides of my nose , centre of my cupids bow , under my cheekbone , below my lips , my jawline , my temples and the top of my forehead .
 
Step 3 : I blended out my contour to make it more natural looking with a damp beauty blender .
 
Step 4 : I then applied some foundation with a stippling brush .


Powder Contouring Step By Step
 
Step 1 : I applied my foundation with a stipple brush .
Step 2 : Using a powder brush I applied a matte highlighting powder under my eyes , centre of my forehead , centre of my chin and down the centre of my nose .
Step 3 : I then went ahead using bronzer to warm up by face and as a transition colour for my contour .
Step 4 : Using a small angled powder brush I contoured the sides of my nose , temples , top of my
forehead , jawline and under my cheekbone .
 
 
So that's that, if there's anything I haven't covered comment or message me with your questions and I will get back to you .

Hope you all have a nice week .
 
Alannah x

Puple Eye Make-up + Nude Lip Tutorial

This is a look that I wore on a night out a few weeks ago and was actually happy with the way it turned out because when I started it I had no idea what direction I was going to take this make up look . The quality of the photos are not half as clear as photos taken on  my camera but I was in a hurry so managed to get a quick picture on my front camera of my phone . This look is a  Purple smokey eye  with purple and black winged liner + nude lips .


Prep
Step 1 : Remove your make up , even if you have no make up on when you cleanse your skin it creates a clean canvas to apply your make up too . The make up also sits on the skin better .

Step 2 : I then applied some lip balm so my lips were nice and moisturised .

Step 3 : I moisturised my skin.

Eyes
Step 1 : I primed my eyelids .

Step 2 : I set my eyelid primer with a cream coloured eye shadow , this helps a lot for blending out your eyeshadows .

Step 3 : I applied a light purple all over my lid and blended it out with a fluffy blending brush.

Step 4 : I then created a purple winged eyeliner , making it thicker then what I would usually go for . If your having trouble with winged eyeliner I have a full blog post here . I did it thicker so that once you apply black eyeliner you could still see the purple eyeliner above it .

Step 5 : I create a black winged eyeliner keeping it thin so you could still see the purple eyeliner .

Step 6 : I applied black eyeliner in my waterline and tightline.

Step 7 : I blended out a dark purple on my bottom lash line.

Step 8 : Working in zig zag motions I applied mascara .

Step 9 : I applied some individual eyelashes to create natural looking thicker lashes .

Eyebrows
Step 1 : I brushed my eyebrows up and then across to get the right shape and to make sure there was no build up of product .

Step 2 : Using an eyebrow gel I started off defining the ends of my eyebrows and worked my way to the front of my eyebrows.

Face
Step 1 : I applied foundation with a stippling brush .

Step 2 : I set my foundation with a translucent powder for a matte finish .

Step 3 : I contoured under my cheekbone , sides of my nose , jawline and temples with a grey/brown powder to create the illusion of shadow .

Step 4 : I applied a little highlighter to the top of my cheek bones , tip of my nose and my cupids bow .

Step 5 : Using a light hand I applied some blusher to my cheeks.

Product List
Prep
 
Face
Translucent Powder : Ben Nye - Neutral Set
Contour :
Blusher : Mac Blusher in Pinch o Peach (discontinued )
 
Eyes
Light Purple Eyeshadow : Coastal Scents Ultra Shimmer Palette
Individual Eyelashes : I envy by kiss -classic flare
Dark purple eyeshadow : Caostal Scents Ultra Shimmer Palette
 
Lips
 
 So that's it for todays blog post hope you enjoyed reading . Any blog post you would like to see leave your suggestions below .

Alannah x

Smashbox Studio Skin Foundation - First Impression

 
Today I am doing a first impressions blog post on Smashbox studio skin foundation .This is my second 'first impression' blog post on foundation on my blog(click here to view first foundation first impression)  . My first one is the most viewed blogpost on my blog . Basically what I do is buy a new foundation , try it out for a day and write what I think about the foundation , pretty straight forward .
 
 
 I never heard much about this foundation which was why I was interested to try it out . Hoping that for the money , it would be worth it . This foundation claims to do it all , its supposed to control oil , last 15 hours and hydrate the skin . Smashbox is a great high quality make up brand that apparently test all there products out infront of hd cameras and lights to make sure there make up brand products are picture perfect . Which this one actually is . It came off lovely in the photos I took. I don't understand how though because it was terrible in real life . Even my mother commented on how bad my foundation was looking .
Just Applied Photos


The texture of this foundation is really strange , it almost feels like a gel and is kind of tacky on the skin .Maybe thats there way of keeping it on the skin .It has a slightly thick texture. I have normal/dry skin more on the dry side recently . I applied it using a stippling brush on completely bare skin to test the foundations true longevity without a primer .The weird thing about this foundation is that it says its hydrating ? I don't think so . Its made parts of my skin look like the Sahara desert . The foundation has a medium to full coverage and a Satin Matte finish . It lasted pretty well throughout the day covering my red cheeks but it did start to get a little patchy near the end of the day . It stayed matte all day no need for any powder. It comes in a glass 30ml bottle with a pump .It has no spf so no camera flash back .
 
                                                                       15 hours later


Over all I wasn't too impressed with this foundation , for the price (£29) I don't think it was up to the standard . I wasn't impressed with the finish of the foundation it just did nothing for my skin.  It is just my first impression though so we shall see , I'll probably have a full review on it on mention it again in a future blog post .
 
 
Alannah x


Mac Studio Fix Fluid Foundation - Review

 
I have been using Mac Studio Fix Fluid for a while now and thought it was about time I did a review on it . Its a really popular foundation here in Ireland , mainly for the fact that Irish girls love heavy coverage foundation to hide our rosy cheeks .

This foundation comes in a 30ml glass bottle with no pump . You have to buy the pump separately which is annoying but it saves pouring too much out and it going to waste .

 
There is spf 15 in it which is pretty standard , not too much so there isn't any harsh flash back . The coverage of this foundation is definitely full . It has a matte finish but I always set it with a translucent setting powder to keep it in place . Use a light hand when applying because it is easy to go overboard and look like you could chisel off your make up . The smell is something a lot of people hate about this foundation , it doesn't really bother me that much . The smell is kind of like paint .

I wouldn't wear this foundation on and everyday basis because my skin would not be able to handle it but for a night out it's a staple .Nc20, Nc25 and Nc35 are my most used shades in my kit and match fake tan really well .They have a huge range of skin tone colours .  I have never had a problem with this foundation coming off what so ever . My favourite way to apply it is with a stippling brush or a beauty blender for a more natural look . I find myself using a lot of product because of the thick consistency not blending out much .

This foundation retails at £22 and the pump costs £4.50. A cheaper alternative is the Maybelline Superstay 24hour Foundation (£8.99) , which may I say might even have better staying power .
 
 
I am wearing this foundation in the pictures shown . I have setting powder on , highlighter above my cheekbones , tip of my nose ,cupid's bow , a little blusher on and some bronzer . Also if you look on my Instagram (alannahharriganmua) this foundation is what is used on most of my make up looks .
 
 
Is there any foundations you would like me to try out or review ?
 
Thanks for reading and I hope you all have a lovely week .
Alannah x

London Imats 2012, 2013 - Pictures , Experiences

Imats London was last weekend so I decided to write a blog post all about Imats . I couldn't go this year but I did attend Imats in 2012 and 2013. If you have no idea what Imats is it stands for the International Make up Artist Trade Show an event with all things make up , demonstrations , make up stalls , make up competitions , make up heaven basically .

2012


I first went in 2012 with my friend Ailbhe and both of are mothers because we where to young to go to London ourselves . We both had a countdown written in are school book and counted down every day till the day we where going , I was beyond excited . We were/are both obsessed with make up and youtube so all we talked about was the make up we where going to buy and the youtubers we might bump into . We went both days , some of the popular make up products (Nyx milk pencil was a big thing then ) were sold out on the Saturday but restocked on Sunday . Sunday was also not as crowded which was nice . It was in Alexander Palace in London that year and in February (I think) . We meet a few beauty bloggers including Samie (BeautyCrush) and Gracie Francesca on the Saturday.

Outside of Imats
 
1st Place Winner


Picture taken with blogger/youtuber Gracie Francesca


2013
 
In 2013 me and my friend Ailbhe went to Imats again with two other friends . We only decided to go to Imats for one day , which was the Sunday . It definitely was busier then the Sunday the year before but I would say it was still not as busy as Saturday . We seen no Youtubers or Bloggers at it that Sunday and I actually think popular Youtubers/Bloggers are banned from Imats because the people running it don't want fans crowding around . In 2013 it was July time and ever since then it has been  summer time when Imats London is on.


... on a buildsight after Imats .... long story
 
 
 Its nice to see make up brands that are harder to get here in Ireland and you have an so much choice of make up  .I loved Imats and London as a city . Any make up lovers will have such a good time at it .
 
 
Imats is in New York , La , Sydney , Toronto , Vancover and London every year .


I cant wait till my next trip to imats and really cant recommend it enough . As a make up fanatic , it really gives me so much inspiration and ambition for my own career in the make up industry .
 
Thanks for reading ,
Alannah x
 

Make up Haul : Smashbox , Nyx , Essence & More

Hey Everyone ,
I haven't bought new makeup in a while now so I decided to do a little shopping . I went to boots and another local chemist for these products . I must say there is some really interesting make up products out right now by a lot of brands . I also eyed up the L'oreal infallible foundation and the Maybelline nude palette which I can see being future purchases  !


What I bought at Boots :

I went into boots and the first thing I picked up was the smashbox contour kit , which actually looks more amazing in person then it does in the pictures. The contour shades have a lovely texture and perfect colour . Not too cool where your look like a corpse or warm toned where you look orange, its the perfect balance in between . As you can probably see by the picture I didn't end up buying it  because I seen more things that were necessities  .
 
Eyelure Lashes Style 100 -  Triple Pack
Eyelure lashes are nice , light weight easy to but on and you can get good wear out of them if you keep them in good condition . They are quite expensive though , but I was running low on fake eyelashes and could justify spending the extra money . I usually order my fake eyelashes on Falselashes.co.uk  . Amazing website , fast shipping, loads of selection and they always have promo codes for an even more discounted price .

Smashbox Primer Water
Heard so many good things about this product so I decided I would invest. I like the concept of a spray prier so I will see how it goes . Expect a review on this in the near future .

Smashbox Studio Skin 15 Hour Long Wear Hydrating Foundation
I am currently in the look for good hd photograpy foundations for my kit
so decided to give this foundation a go . Haven't heard anyone talk about it before but it could possibly just be a hidden gem , we'll see I guess .

Maybelline Eraser Eye Concealer 
When I swatched this in the shop I loved how pigmented this concealer was . It will make a good job of covering up my dark under eye bags . It has a handy applicator althought its not the best for  hygiene . It is an under eye concealer though so I wouldn't recommend it for spots because they would end up spreading like wild fire.

What I bought at a local chemist :

Nyx White Eyeliner Pencil
Something I always have in my kit , absolute essential .

Kiss Individual Classic Flair Combo lashes
The kiss lashes are really good quality for the price only thing I would have to say is the long individual lashes are far too long .

Kiss Lashes in Diva 02
The usual Kiss eyelashes I would go for if I needed them would be the Natural style but they didn't have any in stock so I opt for this style . Not the usual style I go for in lashes but change is good I guess , never know they might end up being my new favourites .

Essence Oh So Matt Lipstick
I always use this lipstick on clients in work. Its matte but it doesn't dry out your lips and is very pigmented . Very inexpensive too . (Yay says your wallet) Some nude lipsticks don't suit a lot of people but this one is like the perfect nude suits so many complexions .

Essence Oh So Matt


That is it for my haul ,  I will have another blog post up later this week so be sure to check back .

Any questions or blog post you would like to see feel free to comment below.

Alannah x