Contouring Made Quick And Easy - Kiko Contouring Pencil Set


Remember those Smashbox contouring sticks that came out awhile back that I included in my make up wish list? Well I didn't get round to buying them but I recently came across those beautiful products  . Smashbox contour sticks retail at £35 and the Kiko contouring pencil £9.90 .

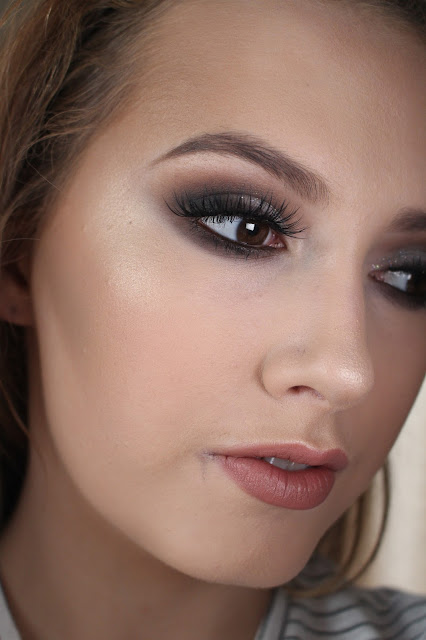
These pencils are very creamy and pigmented . I highlight and contour my usual areas of my face (full blog post here) I blend the contour out with a stippling brush or and angled brush . It blends out really easily then sets and stays put all day . The contour shade is that perfect in between shade of not being too ashy or too warm so it gives definition without your skin looking dull . The highlighter really brightens up the face too. I'm a sucker for cute make up packaging and this rose gold and pink packaging is just beautiful .

Its so handy for anyone in a rush and really compact . If you were in the market for contouring and highlighting products I would buy this over the Smashbox one and save yourself the money .Even though I haven't got the Smashbox highlighting and contouring sticks I can't see how they could make contouring sticks any better then this . I purchased a few other things from Kiko also and there such good quality for the price. Honestly cannot fault this product at all . They are limited edition though so I would advise buying sooner rather then later . The light set is all sold out but I bought the medium to dark set and it still works well on my light skin .

Here's a link to where you can buy them on there website : Click Here

Have any of you tried these contouring pencils yet or the smashbox set ?

Monthly favourites blogpost will be up soon , its hard to believe its nearly September .This year is going so fast .

Alannah x


'No Make Up' Make Up

This tutorial is on the 'no make up look ' , a very natural make up look that makes you look presentable , its quick and easy .
 
Step By Step
Step 1 : I apply a moisturiser to my face first to give my skin a natural glow.
Step 2 : I concealed under my eyes , my eyelids and any redness on my face . I used a light weight concealer so it was invisible on the skin . You could also use a bb or cc cream for natural coverage .
 
Step 3 : With a dark brown eye pencil I worked the eye pencil into my upper lash line , into the roots of the lashes to thicken up my lash line .
 
Step 4 : I applied a light coat of mascara .
 
Step 5 : Using and angled eyeliner brush with a brown eyeshadow I filled in my eyebrows with light strokes .
 
Step 6 : I applied a light brown eyeshadow to my eyelids with a fluffy blending brush.
 
Step 7 : With a pink lipstick I applied some to my finger and dabbed it on my lips to add a subtle tint to my lips .
Step 8 : I applied some lip balm to my lips to moisturize them  .
 
Step 9 : I added some cream blush to my cheeks with a stippling brush . Cream blush tends to look more natural on the skin .
 
Step 10 : I applied some nude eyeliner to my inner lash line to make my eyes more awake looking .
 
 
This is a very natural look but I have more creative looks coming on my blog , which are my favourite kind of make up looks to do .
 
Alannah x


3 Tips for Blended Eyeshadow


If your finding it getting that gradually blended out smokey eye this is the blogpost just for you . Here I have written three tips that really help achieve that blended eyeshadow look . Some of you may already do theses three things but if you don't you should because they make such a difference .

Tip 1 : Apply eyelid primer to your eyelids . This makes the eyeshadows more pigmented , stay on and not crease . It also cancels out the pigmentation from veins etc from your eyelid leaving you with a blank canvas to work on .

Tip 2 : Set your eyelid primer with a neutral shade eyeshadow . I usually use a cream coloured eyeshadow with a fluffy eyeshadow blending brush over the eyelid primer  , this makes blending out your eyeshadow easier and it blends out evenly instead of going blotchy .

Tip 3 : Use a transition shade . Game changer , this really create that blending out smokey look . With a fluffy eyeshadow blending brush blend a shadow that's lighter then the colour in your crease into your eye socket . This creates a nice gradual fade from eyeshadow into skin .

That's it for todays blogpost , hope you all had a nice weekend and I will have a new blog post up again shortly .

Alannah x

Simple DIY - Make-Up Brush Organiser / Holder


Something a little different today as I was stuck in the house all day yesterday with no company , internet or transport I decided to get creative which I sadly don't do very often anymore . I came up with this DIY idea a while back but never got round to creating using things that are laying around most peoples house I created a make up  brush holder that can help you keep your eye, lip and face brushes separate . You could even use it for lip liners or eye pencils . I went with a pastel polka dot theme but you can use whatever colours you like . You could also label them to keep them more organised for example Lips , Eyes , Face . Its easy to make and inexpensive  .

What you'll need :

- The cardboard tube from the centre of toilet roll 
- Colourful Paper
- Ribbons
- Glue Stick
- Scissors
-Pen
- Cereal Box (or cardboard)
- Pebbles (to put inside the brush holder)


Step 1  : Start by cutting your paper , you want it to be wide enough to cover the roll and longer then the tube in length so you can glue it inside the tube .

Step 2 : Cover the tube with glue then roll the paper around it making sure the roll is completely covered .

Step 3 : At the top of the tube where the paper is longer then the tube cut a few little upside down triangle shapes around it . This makes it easier to fold the edges inside the tube and glue them down  .

Step 4 : Repeat this on all of the tubes .

Step 5 : Then at the bottom of the tube where the decorative paper is too long cut some upside down triangles to make it easier to stick down to the bottom of the make up holder .

Step 6 : Trace the shape of the tubes onto cardboard from a cereal box .

Step 7 : Cut out what you have traced on the cardboard .

Step 8 : Glue the bottom edges of the tubes to the cardboard .

Step 9 : Put some decorative pebbles into the holders to keep them balanced and stop them from falling over when you put your brushes in them .

Step 10 : Organise your make up brushes into the right holder .


If anyone tries this DIY out let me now how you get on . Its fun doing something a little different from my usual content . Hope you all have a nice week .

Alannah x