

Watch in HD 'here' . Please subscribe to my YouTube channel if you like my videos to be notified when I upload .
The first thing you need to decide on is what product you want to use & find easiest to use.
Gel Eyeliner - Great for professional make up artist for hygiene & how black and pigmented it is . Very unforgiving for new beginners . If you make a mistake it can be very hard to remove .
Favourite Gel Eyeliner : Inglot AMC Eyeliner - 77
Liquid Eyeliner - My favourite of them all . As I said in the video for the reasons being you can get a fluid , sharp & defined wing . Its more forgiving then gel & I get use out of the whole tub . Good for covering fake eyelash bands. Its not the easiest way to apply winged eyeliner , but it looks well .
Favourite Liquid Liner : Essence Essence Dip Eyeliner
Felt Tip Eyeliner - Very similar to liquid eyeliner . Not great for make up artists as its not hygienic but perfect for your own make up bag . Not as pigmented as Gel . You have a lot of control over eyeliner but the felt of the eyeliner really matters , if it has a thick felt you'll end up with thick eyeliner . Good for beginners .
Favourite Felt Tip Eyeliner : Collection Extreme 24 Hour Felt Tip Liner
Pencil Eyeliner - Not great for winged eyeliner , the pencils usually too thick and would make it very difficult to do winged eyeliner with .
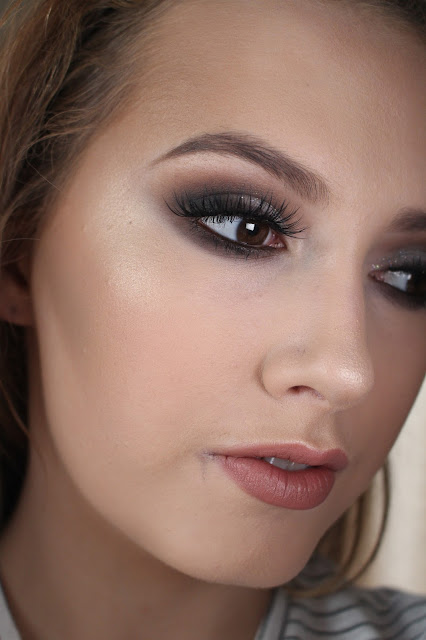
Black Eyeshadow (with a damp brush) - I personally think this is the best for beginners . Really easy removed (but does last all day/night) if you make a mistake . Most people have black eyeshadow(make sure its pigmented) so you dont have to go out & buy a new product .
Favourite Black Eyeshadow : Really just any black eyeshadow that has good pigmentation .
Step 1 -
You want the angle to elongate & slightly lift your eye without being too arched . Make sure you are opening your eye while doing it because if you have your eyes are closed it is going to look completely different when you open your eye . I aim in the direction of the bottom of my eyebrow . Its up to you how thick of thing you like your eyeliner .
Step 2 -
After I create the wing I then go on to do the inner part of my eyelid . Using a small brush & the black (or whatever colour you want) I start doing little small brush strokes in the inner corner of the eyelid .
Step 3 -
I then fill in the centre part of the eyeliner , joining the outer wing to the inner part of the eyeliner .
Top Tips
- Steady your elbow on a table to avoid shakiness & balance your baby finger on your cheek to steady your hand .
- Concealer under the wing to sharping it .
- Use sellotape if you are finding the wing really difficult . Just make sure both wings are at the same angle .
- Have a firm enough grip on the brush your using just so you have more control .
I also did another blogpost on eyeliner a while back . 'Click Here' if you want to have a look at that blog post also . Hope this post/video helped . Any other questions you may have feel free to message me .
Thanks For Reading /Watching .
Alannah x

.JPG)

.JPG)

No comments