

*Exact products I used listed below*

Step 1 : Make sure there is no make up or extra oil on her face by using bioderma .
Step 2 : I moisturised here skin so by the time I am on the skin it will have settled in .
Eyes
Step 1 : Prime the eyelids .
Step 2 : Set the eyelid primer with a setting powder or eyeshadow .
Step 3 : Apply a transition colour into the crease of your eyes. I used a light peach shade .
Step 4 : With a smalls detailer brush apply a medium brown colour to the outer and inner corner of the eyelids leaving the middle of the eyelid free from eyeshadow .
Step 5 : Blend the eyeshadow previously applied into the transition colour , still leaving the centre of the eyelid free from colour .
Step 6 : Dampen your eyeshadow brush and apply a gold eyeshadow to the centre of your eyelid .
Step 7 : Use a small blending brush and blend the edges into the brown eyeshadow .
Step 8 : Apply winged eyeliner (click here for full indept winged eyeliner tutorial) .
Step 9 : Line your waterline and tighline with a black eye pencil .
Step 10 : Blend out a dark brown eyeshadow on your bottom lash line .
Step 11 : Apply mascara .
Step 12 : Apply lashes .
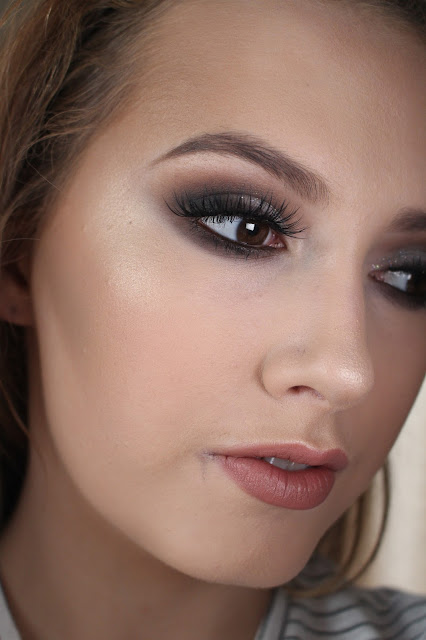
Step 13 : I highlighted the inner tear duct with a pearly white colour . I love highlighter in the inner tear duct , i think it really brightens up the eyes .
Foundation
Step 1 : Now that the moisturiser has settled in apply some foundation . I used a medium to full coverage foundation .
Step 2 : Powder the foundation to set and to make the make up look matte in photos .
Step 3 : Apply some bronzer to warm up the face .
Step 4 : Apply some highlight to the tops of the cheeks , nose and cupids bow . This will reflect light and make your skin glow in all the right places without looking oily .
Eyebrows
Step 1 : Using an angled brush and a brow cream gel i filled in her eyebrows , making them slightly longer at the ends and slightly darker in colour then she would naturally go for .
Lips
Step 1 : Lined here lips with a lip liner .
Step 2 : Applied lipstick .
Product List
Eyes
Eyeshadow base : Collection Lasting Perfection Concealer
Set the eyeshadow base : Ben Nye Neutral Set Translucent Face Powder
Transition colour: Make up geek eyeshadow-peach smoothie
Medium brown eyeshadow : Urban Decay eyeshadow - Tease
Gold eyeshadow : Urban Decay eyeshadow - Half Baked
Eyeliner :Bourjois Mega Liner Ultra-Black
Pencil eyeliner : Gosh cosmetics white kohl eyeliner pencil
Inner Tear duct Highlight : Wet n Wild corrector palette - the white pearlescent shade(cant seem to find it online)
Inner Tear duct Highlight : Wet n Wild corrector palette - the white pearlescent shade(cant seem to find it online)
Fake eyelashes :Ardell lashes - 110
Eyebrow gel : Anastasia beverly hills dipbrow pomade - Dark Brown
Eyebrow gel : Anastasia beverly hills dipbrow pomade - Dark Brown
Face
Moisturiser : Embryolisse Concentrated Lait Cream
Concealer : Collection Lasting Perfection Concealer- Medium
Corrector : Make up Designory Corrector - RC1
Foundation : Mac cosmetics Studio Fix Fluid SPF 15 - NC25 & NC35 mixed
Bronzer : Make up Designory - Endless Summer
Highlighter : Sleekmakeup face form contour-light
Setting Powder : Ben Nye Neutral Set Translucent Face Powder
Lips
Lipstick : Rimmel Moisture Renew Lipstick-Vintage Pink
Hope you all have a lovely day and thanks for reading .
Alannah x

.JPG)

.JPG)

No comments