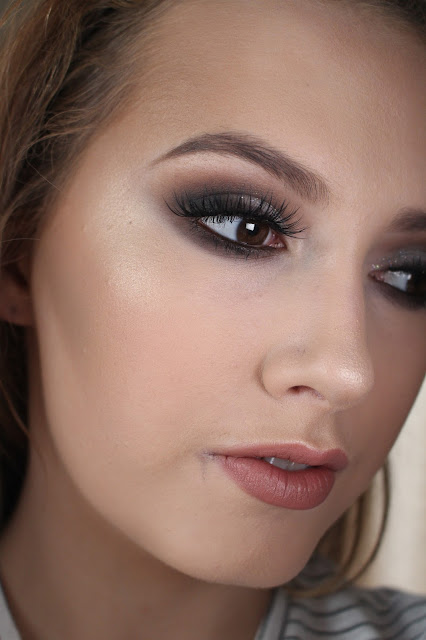
Yayy a blog tutioral thats not my face! Todays blog post is on this make up look i did on my sister one night she was going out . She likes dark/strong make up , so thats what i did . She also asked for and intense inner tear duct highlight . Hope you all like this step by step guide to achieve this look and if you have any questions feel free to comment below .
*Exact products I used listed below*
Prep
Step 1 : Make sure there is no make up or extra oil on her face by using bioderma .
Step 2 : I moisturised here skin so by the time I am on the skin it will have settled in .
Eyes
Step 1 : Prime the eyelids .
Step 2 : Set the eyelid primer with a setting powder or eyeshadow .
Step 3 : Apply a transition colour into the crease of your eyes. I used a light peach shade .
Step 4 : With a smalls detailer brush apply a medium brown colour to the outer and inner corner of the eyelids leaving the middle of the eyelid free from eyeshadow .
Step 5 : Blend the eyeshadow previously applied into the transition colour , still leaving the centre of the eyelid free from colour .
Step 6 : Dampen your eyeshadow brush and apply a gold eyeshadow to the centre of your eyelid .
Step 7 : Use a small blending brush and blend the edges into the brown eyeshadow .
Step 8 : Apply winged eyeliner (
click here for full indept winged eyeliner tutorial) .
Step 9 : Line your waterline and tighline with a black eye pencil .
Step 10 : Blend out a dark brown eyeshadow on your bottom lash line .
Step 11 : Apply mascara .
Step 12 : Apply lashes .
Step 13 : I highlighted the inner tear duct with a pearly white colour . I love highlighter in the inner tear duct , i think it really brightens up the eyes .
Foundation
Step 1 : Now that the moisturiser has settled in apply some foundation . I used a medium to full coverage foundation .
Step 2 : Powder the foundation to set and to make the make up look matte in photos .
Step 3 : Apply some bronzer to warm up the face .
Step 4 : Apply some highlight to the tops of the cheeks , nose and cupids bow . This will reflect light and make your skin glow in all the right places without looking oily .
Eyebrows
Step 1 : Using an angled brush and a brow cream gel i filled in her eyebrows , making them slightly longer at the ends and slightly darker in colour then she would naturally go for .
Lips
Step 1 : Lined here lips with a lip liner .
Step 2 : Applied lipstick .
Product List
Eyes
Face
My next blog post should be up Thursday/Friday with a full review on the Loreal true match foundation that i did a first impressions blog post on so stay tuned for that . Getting a little bit more organised with this blogging thing .
Hope you all have a lovely day and thanks for reading .
Alannah x


.JPG)

.JPG)
