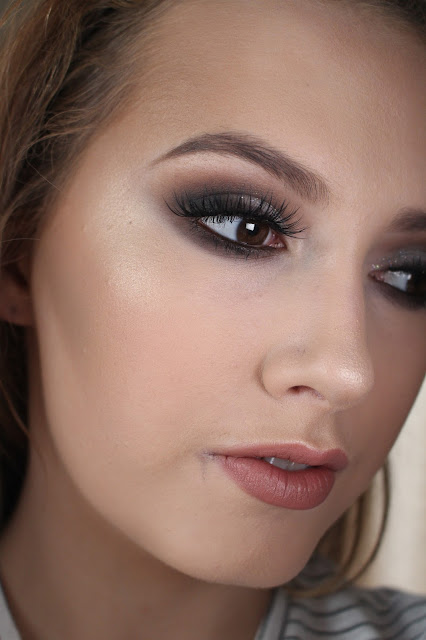
Light/Medium Coverage Foundations

My favourite kind of foundation for everyday wear is a breathable light/medium coverage foundation  . Something that gives a nice healthy glow. Todays post is three short reviews on affordable foundations that fit in this category. This blog post is also kind of my favourite everyday foundation / empties blog post .

 
These foundations are great on teenage girls who want to wear a little bit of make up to school but nothing over the top , mature skin , normal/dry skin or people with freckles that still want the freckles to be seen . Theses wouldn't be the best foundation choice for acne prone/problematic skin , girls who like full coverage or oily skined girls .

Boujois Healthy Mix Serum Gel Foundation

So many people rave about this foundation including Pixiwoo and Lisa Eldridge . Its light coverage but buildable and dewy . Its comes in a glass bottle with a pump . Its one of those foundations that goes undetected on your skin and does last all day . The best way I found to apply it was with a stippling brush for even coverage . I recommend using a moisturiser or primer underneath for a flawless finish . Great for dry/normal skin girls or if your skins dehydrated . Most long lasting out of the three foundations .I would buy this foundation again , the only bad thing I have to say about it is that its takes a lot of product to get a medium coverage and once finished with the foundation I feel like there is still so much left inside . There is only six shades in the range sadly .  The foundation is made from vitamin-rich fruit therapy formula with litchi, goji berries and pomegranates.
£10.99

No7 Stay Perfect Superlight Foundation

I never heard about this foundation but before I went on holidays last summer I decided to go into boots to buy a foundation for my holidays that had spf and that wouldn't melt off in the sun . I asked one of the ladies at the No7 counter who was obvisibly biased to the no7 range which foundation did she recommend and she choose this one . I liked the runny consistency because it reminded me of Chanel Aqua Lumiere that I have never tried but have swatched on my hand before so I thought it might be a good dupe ( if I ever try Chanel vita lumiere I will do a comparasion blog post of the two ) . I tan in the sun so I got it a shade darker then what I usually wear . This is a really natural foundation that feels like you have nothing on your skin. It did get slightly oily looking on a night out on holidays but that happens to the best of foundations just bring some powder in your bag .Not the most buildable of foundations , you would have to use a lot of product to get a medium coverage. I applied it with my fingers and found that worked best . I think this foundation is best for a summer holiday or a natural photo-shoot rather then the windy weather of Ireland .
14 shades in the range . £14.50

The Body Shop Moisture Foundation Spf 15

My favourite out of the three it just has the most beautiful finish. It makes your skin look you have a healthy glow but not greasy in any way . My mother also wears this too and its great for mature because it doesn't make the fine lines and wrinkles more obvious which some thicker foundations can and makes the skin look more youthful . Easier to build up to a medium to full coverage to then the others . Great packaging because you have zero waste of product and a pump that pumps out a nice amount . Has a nice consistency not to thick or to runny .Lasts all day on the skin but if you were going out in the evening after a long day of wearing it you would probably need to touch up .This really is an unsung hero . 7 shades in this range . I ran out of an everyday foundation so  this will definitely be repurchased . £13


All this foundations are 30ml bottles . None of the foundations have caused any breakouts or reactions on my skin .

Hope you all enjoyed this blog post . If you have any questions feel free to comment below .

Alannah x

2015 Fashion Trend : Metallic Tattoos

 
Last summer it was henna for this summer I think it will be all about the metallic tattoo jewellery . I have been seeing them all over Tumblr and recently spotted some in Penny's and bought one of the packs they had to offer .


I personally really like them and think there a nice little accessories to add to you outfit .Perfect for the summer festivals and very bohemian . These are only Temporary and will wash off in the shower so its prefect for people like me that get bored easily , you can changed it up whenever you like . When I first applied it I was like oh god definitely hiding my wrist all day haha , but after a few hours it faded slightly and wasn't as in your face, which I preferred .


At the minute Penny's only have two designs , the small ones (little bows) and the larger ones (arrow designs) . I reckon  they will have more designs soon as they are getting more popular . I have also seen some cool designs online that I might purchase when this pack runs out .You can also get ones that looks like jewellery (necklace's , bracelet's etc ). I usually don't really like trends but I am actually really liking this one . By September we will all be sick of them and have a new fashion accessories but till then , the metallic tattoos are staying put .


 Hope you all enjoyed this blog post , feel free to comment below if you have any questions .

Worth the Hype ? Anastasia Beverly Hills Dipbrow Pomande Review

So its been a few month now since I uploaded my Beautybay.com haul were I bought two of the Anastasia Bervely Hills Dipbrow Pomande and I thought it was about time I did the review on them as promised . Anastasia Beverly Hills products have gotten really popular over the last year especially on Youtube and Instagram .


 I was slightly sceptical about trying theses products because there is that many new make up brands and products coming out that I sometimes wonder when a beauty guru raves about a product is it going to be a product that they'll love for a month then find a new favourite the next. I am also not a fan of severely structured and overly done eyebrows . Its just not my cup of tea . I was worried I would end up with really harsh eyebrows . Surprisingly I was proven wrong and actually like this product a lot .


I have medium brown hair with cool toned highlights , I wasn't sure which colour would suit my eyebrows best so I decided to get two shades , Blonde and Dark Brown . I figured if blonde was to light I could mix it with dark brown and vise versa . I use blonde for everyday wear but on a night out if I wear a dark smokey eye I will do a darker brow just to balance the look out .

Before using dipbrow I used a brown eyeshadow which did the job but it took a lot more time to get the look desired . The dipbrow is and extremely pigmented gel/mousse like formula that makes drawing on your eyebrows effortless . Its can create a natural brow or a drag queen brow its just about how you apply it . It does takes a little getting used to . Word of advice : A little goes a looooong way and a dense small angled brush works best to apply it with. I  usually apply the product to the ends of my eyebrows and work in the way .Your eyebrows will not bugde all day even if it is raining (this product is waterproof , YAY ! )  .

I really do like this product , I think all of the hype was because it was something new . Do I think it was worth the hype  ? Yes I do , its long lasting , pigmented and will create any kind of brow you want . The only thing I will say about this product is I am not completely loyal to it , more brands are coming out with similar formulas for eyebrows and I don't think this will always be in my make up bag ; but for now , it does a pretty good  job .


Left Eyebrow : Dipbrow in Blonde , Right Eyebrow : Dipbrow in Dark Brown
 

Dipbrow in Blonde


Dipbrow in Dark Brown
 
 
 Heres a link to the website I bought them off : http://www.beautybay.com/cosmetics/anastasiabeverlyhills/dipbrowpomade/
 
Hope you all enjoyed this blog post , if you have any questions feel free to comment below .

Valentines Day Make up Step By Step - Dusty Rose Eyes , Double Wing & a Red Lip


Not sure what kind of make up to do on yourself on Valentines Day? Look no further , wither your spending Valentines nights on a date or going out partying with your single friends this look will is perfect for the occasion and will look great on everyone . Here is a step by step tutorial on how I created this double winged , dusty rose eye with a red lip look.(that was a bit of a mouthful)

Face Prep 

Step 1 : Cleanse tone  and moisturise as always . ( I used Bioderma Crealine and for moisturiser I used Bioderma Hidro Riche which I am currently loving , its a great lightweight moisturiser for underneath foundation ) .

Step 2 : Apply some lip balm to you lips so they are nice and moisturised when your applying your red lipstick . (I  used Nuxe Reve de Miel  , I also reviewed this product : http://alannahharrigan.blogspot.ie/2015/02/lip-saver.html ) .

Eyes 

Step 3 : Prime your eyelid using concealer or a eyelid primer . Blend it out with your finger (I used Nyx Concealer wand )

Step 4 : Dust a cream eyeshadow all over your primer to set it , works best using a blending brush . (I used Urban Decay Foxy eyeshadow ).

Step 5 : In the crease of you eye apply a peachy pink eyeshadow (or blush , I used pinch o peach by mac which is discontinued but apparently elf blush in passion pink is a dupe , also a hell of a lot cheaper ) I applied it with a crease brush and blended it out with a fluffy blending brush . Do the same on the bottom lash line.

Step 6 : With a more dense eyeshadow brush apply a grey brown eyeshadow (I used an Inglot eyeshadow in the number ) on top of the peach colour you have just applied but make this more defined . Then buff out the eyeshadow with a clean blending brush, make sure to blend it too much , you still want to know its there .

Step 7 : Using a liquid or gel eyeliner draw a line on the top of you lashes then extend it out into a wing. Just below the wing leave a small gap and draw a line mimicking the wing . (I used Bourjois Mega Liner Ultra Black) .

Step 8 : Apply some white eyeliner on your waterline , inner tear duct and in-between the two wings . ( I used milk jumbo pencil by Nyx with a thin eyeliner brush ).

Step 9 : In zig zag motions apply your mascara . I find applying it in zig zag motions works best for giving your lashes length and volume ( I used maybelline great lash mascara ) .

Step 10 : Apply fake eyelashes . This step is optional but adds a bit more drama.( I used Red Cherry Wsp lashes ) .

Eyebrows 

Step 11: I brushed my eyebrows up and then applied Anastasia Beverly Hills dipbrow in blonde to my brows using a small angled brush . My eyebrows need plucked but i can't bring myself to the pain of plucking them so excuse the stray hairs haha .

Skin 

Step 12 : I then apply some foundation to my face . The one I am using at the moment is Bourjois Healthy Mix serum  (If anyone would like a review on this foundation , just ask ) .

Step 13 : After applying my foundation I covered up my huge eye bags that felt like they were down to my ankles and any other blemishes using collection lasting perfection concealer  .

Step 14 : I used Make up Designory bronzer in endless summer to add some warmth to my cheeks .

Lips 

Step 15 : Line your lips using a red lip pencil. (I used a red lip pencil , not to sure what brand its from ,the writing has rubbed off ) .

Step 16 :Using a small lip brush apply a red lipstick to your lips . (I used Sleek Make up Stiletto ) .


Hope you all enjoy and have a lovely Valentines Day, if anyone has any questions comment below.


Lip Saver - NUXE Rêve de Miel Ultra-Nourishing - Review


Todays blog post is a short review on NUXE Rêve de Miel Ultra-Nourishing (aka my lip saver)  .

I never really wear bright lipsticks because they always end up drying into the cracks in my lips , even if i have exfoliated before hand . I think matte lipsticks are so pretty an so happy i can finally wear them because of this product . It has a unusual texture, it looks matte but is so moisturising when on the lips . I have no idea how they did it but it works . If you never wear matte lipstick because of your dry lips or are just sick of having dry lips , i would definitely recommend this lip balm . Cant say enough good this about it. Unlike some  lip balms it doesn't dry out your lips when you stop using it .  It is a really big pot for a lip balm so it is going to last me ages .It smells(like honey an  lemon)  and looks so luxurious   I would recommend this to anyone . I have also tried the stick form which is also good but not half as effective.


I got mine in France but at the moment gorgeous shop.com are having a 20% off Nuxe products sale : http://www.gorgeousshop.com/nuxe-reve-de-miel-ultra-nourishing-lip-balm-15g.html